Wednesday, May 18, 2011

Shoe Dilemma

I'm baaack! The semester is O-V-E-R! So, now I'm working close to full time at my part time job and focusing on wedding details.

Today I updated my budget and emailed vendors to check on competing prices. I'm a haggler.

Okay. So. I have this dilemma. I am inherently frugal (thank you mother for instilling this in me). It's about time that I take my dress in to get it altered and I need to have shoes first. Here's the issue:

SHOES
Beautiful, Beautiful SHOES!
All of the above shoes are approximately $100 and are by my new favorite designer Poetic Licence.
I know, I know. They're wedding shoes. I'm supposedly allowed to splurge. BUT  I really am feeling guilty about even considering buying $100 shoes.. I've never bought shoes that cost that much and probably never will again (if I do).

Here's a cute casual alternative that I would definitely wear the heck out of after the wedding. And hey, who is really going to see my shoes, right?


They look a little more turquoise than in this picture. And...they're less than $40.

So, ladies...Are my splurge shoes worth it? Is this a stupid question (I'm thinking it probably is)? Which ones do you like the best?


Monday, May 9, 2011

2 Months!

So, its getting late, but I really wanted to post today even though I don't have a whole lot to say. Here goes:

We've got two months left until the Big Day!
Woohoo!


So, I've got a crazy long list of things to do for the wedding, but I'm trying to put it off until finals are over this week. 
But...here's some hair inspiration to tide you over. I love these! 
Which one is your favorite?

Have a great week!

Tuesday, May 3, 2011

Spring Break & Grad Invites

Last week, Justin and I went with a group of friends on a Church history trip. We went to Independence, MO & Nauvoo, IL. Here's a few pictures.


We had such a good time!

So, Justin is graduating later this month! I'm so excited!!
We made a few simple announcements for his family. Here's Justin making some.

I blurried out some of the details, but we got some really neat scrapbook paper and printed up our own announcement. I downloaded a really neat font to do his name. We made about 20 of them, and they were really cost efficient. 

There is about a week and a half left in the semester for me, so I might be silent for the next week or so. There will be plenty of DIY wedding crafts after class is out, scout's honor!

Friday, April 22, 2011

DIY Fun with Doilies

Sorry it has been so long since I posted! It's the end of the semester and things are getting crazy!!

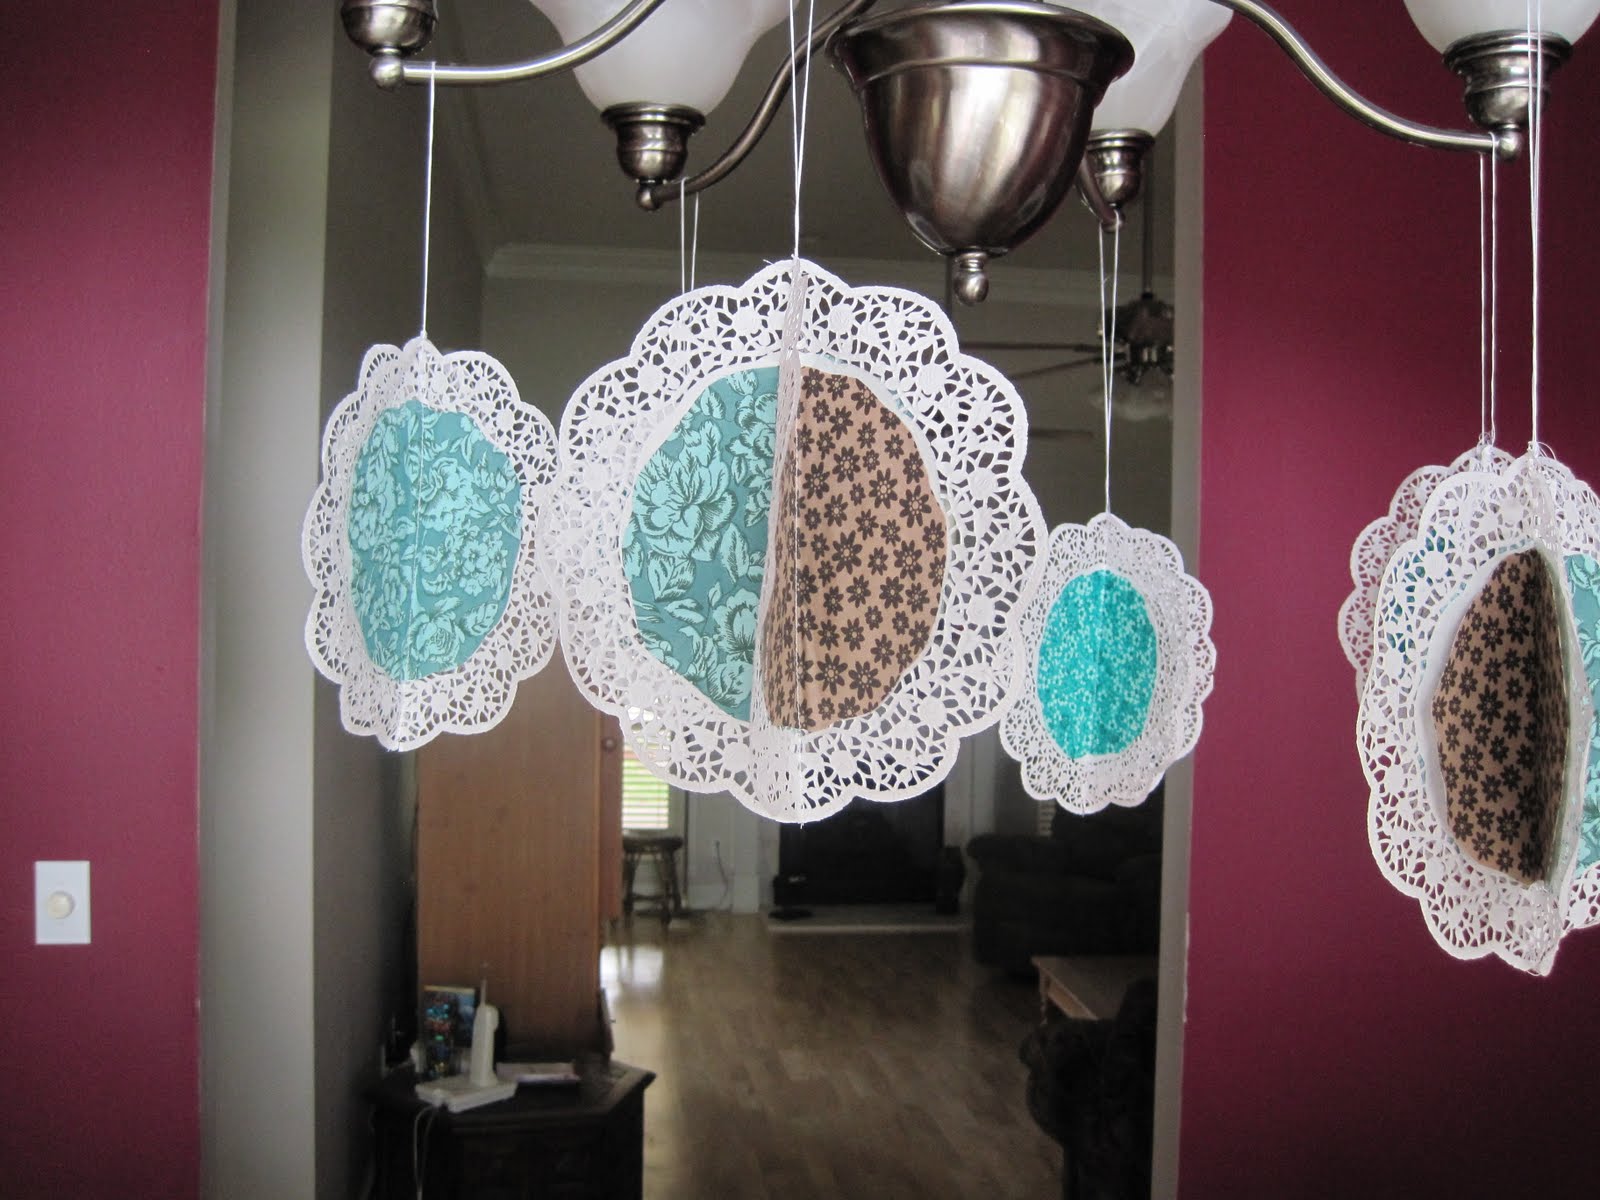
So, a few weeks back I came across a tutorial on Tatertots and Jello. It was actually a guest posting from Erin at Lemon Tree Creations. She created this AWESOME doily mobile for a nursery, but I'm taking her idea and applying it to my wedding. 

As I showed you all earlier, I found some really cute fabric that goes well with my colors and my vintage/antique-y look that I'm going for with my wedding. Here's what I made!


I hung a few from the chandelier in our dining room so you can get a feel for what it would look like.


Cool, huh?
I'm going to hang them in the gazebo for our reception up north!
I'm also thinking about twisting this idea again and make chair ties (instead of sashes/bows).

Well, that's all I have for now. I hope everyone has a great Easter!

Tuesday, April 12, 2011

Project Preview

Hey ya'll. 

I've got a huge research prospectus due on Friday for my Neuropsychology class, so not much wedding stuff is progressing. I have to present a potential research experiment about altruism, and it's worth about 40% of my semester grade. So, wish me luck!

Since I haven't done much, I'll share a couple of pictures with you.

The first is of an awesome find I got last weekend while garage sale-ing.
Super cute cake plate for $2! 

Next is a sneak peek for an upcoming project.


I found these super cute fabrics at a local fabric store. They happened to have a sale when I was there. One was on clearance, and the other two were 50% off. I only needed a 1/2 yard of each, so I paid less than $6 for my fabric. I was going to buy fat quarter bundles online, but (a) I didn't need that much fabric and (b) they were all more expensive that what I found.

I'm really excited about this project and can't wait to share it with you all when I get done!

Oh, before I forget! I want to invite all of my new followers! About 5 new people have joined in the past week! Leave me a comment and let me know who you are. Also, if you have a blog of your own, share it with us!

Have a great week!

Wednesday, April 6, 2011

Newsprint Pomander Tutorial for the Brave


If you remember, I posted a few weeks about these beautiful pomanders that I wanted to make for our reception. Well, I made one (actually 2, the first one was really awful).

I got ideas how to make them from this tutorial, but my instructions vary a little bit. Here's the step-by-step tutorial.
You'll need a Styrofoam ball, hot glue gun with a couple of glue sticks (I think I ended up using 3 or 4?!), some ribbon, and circles of newspaper. I used a coaster I have as my template.
I folded my paper circle in a shape that kind of looks like the "fortunes" we used to make in middle school.

I put a tiny dot in the center so my fold would hold.

What worked best for me was to put my hot glue directly on to the ball. You take the folded circle and squish it on to the ball. Hold it there a few seconds to let it adhere.
Important Note: Make sure you put the "petal" straight vertically. If you start trying to fill in the empty spaces by kind of adhering them sideways, your pomander will look uneven and weird (that's what happened to my elusive first try).

Glue the ribbon when you're getting close to the end. Then fill in petals around it and spaces that you may need another one.

Here's a look at the finished product. I think it looks really nice. I'm not sure it fits in just right with the look of my wedding that I'm trying to get across.

So, the pomanders were pretty cheap to make. I bought a 2 pack of "medium" Styrofoam balls for $4.99, and I already had all of the other supplies.

So, here's the truth about making these little poms: 
It took me a relatively long time to make just one pomander. I think it probably took me 45 - 50 minutes to complete one. I can only imagine how long it would take (in total) to make all of the poms that I would need. I'm thinking I would need 15 of them, at least. I don't really have that kind of spare time these days.
They don't turn out THAT large. Here's a picture relative to some objects that are on my mantle.
I can only imagine how long it would take to make a pom using one of the larger Styrofoam balls.

Lastly, the tedious part was not cutting out the circles (which I thought it would be), but the hard part was putting all of the petals on the ball. It only took me 3 or 4 minutes to cut out the circles (it's really easy to cut newspaper in large stacks). The tedious part is adhering all of the petals so that it looks even. I'm sure I'd get faster at it after doing another pom.

Don't get me wrong, I LOVE these poms. But I've decided to not make any more of them. I don't have the time or the patience.

This project is great for someone who has patience and time on their hands (or a bunch of bridesmaids or a mother that is willing to make an afternoon of making these).
Okay, last tip: use a low heat glue gun or you will burn the mess out of your fingertips.

In lieu of not doing these poms, I have yet another DIY project I'm considering that should take less time. Click HERE if you'd like to take a peek.

Monday, April 4, 2011

Invitation Mock Ups!

My step sister Melissa is designing our invitations for us. She wasn't able to take our pictures for us, but I'm looking forward to her taking our reception and bridals in Idaho.

Check out Melissa's Blog. She's really talented!

I didn't get anything done wedding wise this weekend. Justin and I went to Vidalia to spend time with his parents, younger sister, and her family. 
Here's a picture of me and my niece!
Have a great Monday ya'll!